Stucco can be a beautiful and durable option for the exterior of homes. However, it is important to understand that cracks in stucco can indicate underlying problems such as mold or moisture damage.

Minor cracks smaller than 1/16 of an inch can often be repaired with caulking. However, if the cracks are extensive, remediation may be needed. For professional help, call Stucco Repair Philadelphia now!
Cracks are a common stucco problem and can be a big nuisance. Often, cracks are caused by thermal expansion and contraction that occur when the sun heats up the house. Hairline cracks can be repaired with joint compound, but more serious cracks should be handled by a professional. Reputable companies will fix the problem properly so it doesn’t happen again in the future.
A reputable company will first determine the cause of the crack and whether or not it is a structural issue. If the cracks are caused by a foundation settling, they may be able to help you solve the issue and prevent further damage. The cracks could also be due to a buildup of water that has penetrated the wall and caused damage.
If the cracks are not due to a building movement, they can be fixed by simply patching them. Depending on the severity of the cracks, you will need to prepare the area before putting in the new patch. The cracks should be widened with a cold chisel to allow the new material to “key in.” This can be done without disturbing any intact stucco, so if you are not comfortable doing this yourself, it is best left to a professional.
Once the crack is widened, you should pull back the old metal lath (also called lath sheathing) from the non-damaged stucco around the area of the crack. This will protect the wood and keep moisture away from it, thereby avoiding further damage.
It is also a good idea to put a sheet of 15-pound tar paper over the area. This is not only a great moisture barrier, but it will also help the new stucco bond with the existing material.
Next, you should examine the crack to see if it is springy. Loose stucco often bulges and feels spongey to the touch. Tap gently with a wood or acrylic hammer to hear if the crack is hollow. Weak keys will sound hollow, while intact keys will return a solid sound. If the crack is hollow, then you should remove some of the loose stucco and chisel the edges to help create a good mechanical attachment for the patch.
Repairing Holes
Small hairline cracks are easy to fix with exterior latex paint that matches your stucco. This will help to blend it in and make the area look like it was never damaged. Larger holes in your stucco need to be repaired more permanently. First, use a hammer and cold chisel to remove any loose stucco that has fallen out of the hole or has been pushed out by moisture.
Next, carefully examine the hole for signs of water penetration. If the area around a window or other point of entry is affected, it’s often a sign that there is a serious moisture issue behind the wall that needs to be addressed with a remediation project.
Moisture penetration through your stucco wall is not good, as it can lead to mold and wood rot, which can cause damage throughout the structure of your home. Before you decide to fix the problem, consult with a stucco remediation expert and see what options are available for addressing the underlying issues that are causing the moisture damage in your walls.
Remediation is more costly up front, but it is also a permanent solution to the problem that will not recur. It involves removing and replacing the affected sheathing, framing, and insulation and is usually done in conjunction with waterproofing services.
Before beginning any exterior stucco repairs, prepare the area by cleaning it with a wire brush and wet sponge. This will ensure that the patching compound sticks to the surface. It’s a good idea to clean about five inches on each side of the hole and to remove any loose flakes of paint or stucco.
Start by pulling back the old metal lath from the non-damaged areas of your stucco using a pair of metal snips. Once the old tar paper has been pulled back, cut and staple a piece of new galvanized metal mesh stucco lath to the wall in place of the old tar paper. The new lath should be placed so that it is facing out, away from the wood framing.
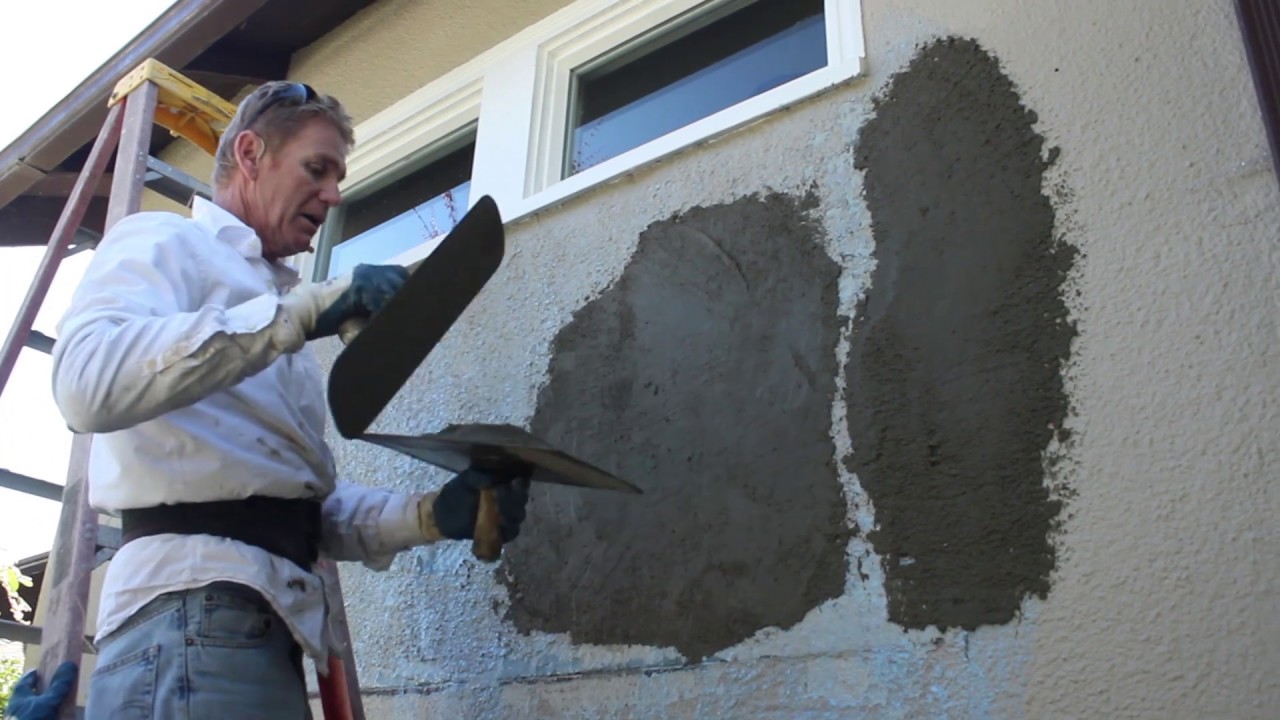
Apply a thin layer of stucco patching compound to the surface of your repair area, and use a putty knife or trowel to spread it evenly. Allow the compound to dry, which can take up to 24 hours. Once it has dried, you can texture the patch and paint it to match the surrounding surface of your home.
Repairing large cracks
Unlike hairline cracks, these are larger and can indicate more serious issues. Specifically, they could be signs of improper installation (incorrect locations for expansion joints), a base coat applied before the stucco had time to properly cure, or poor construction practices.
If this is the case, you may want to consider removing the top layer and having a professional replaster the wall system. This type of restoration requires much more labor and skill but can bring the walls back to their original condition.
To fix large cracks, you need a different repair product than those used for hairline cracks. First, a wire brush should be used to clean the area and remove loose particles. Then you need to widen the crack using a cold chisel or hammer, making it at least a quarter inch wider throughout its length. This allows for better mechanical attachment. Make sure not to chisel away too much of the good stucco surrounding it, as this could compromise its strength.
Once the crack is widened, use a premixed stucco patching material to fill the area. Make sure to use a product that’s formulated for plaster, like Quikrete’s sanded acrylic exterior caulk. After the patching material dries (follow the manufacturer’s instructions), it can be painted to match the existing color of the stucco.
Alternatively, you can use an alkaline-tolerant concrete caulking that bridges the crack and can expand or contract with temperature changes. It’s important to choose a color that matches the surrounding stucco so that the crack isn’t immediately noticeable.
Another option is to use a pigmented coating over the entire surface, such as lime washes, mineral paints, or a “fog coat” of pigmented cement. Be aware that these types of coatings will not hide the cracks, but they’ll help slow their progression and extend the life of the plaster.
Lastly, you can also cover the plaster with a textured stucco finish. Again, the product you choose should be alkaline-tolerant to ensure that it will last and not peel or flake off with time. It’s also important to find a contractor who has experience with this type of finishing, as they will have the knowledge and skills necessary to ensure that your new plaster looks great for years to come.
Repairing large holes
If you notice holes in your stucco, it’s important to repair them right away. Large holes can lead to water intrusion and damage the interior of your home.
To repair a hole in your stucco, start by cleaning the void and surrounding area using a wire brush or vacuum cleaner to remove any loose debris that may sabotage your repair work. Next, apply a layer of fiberglass mesh to the void to strengthen your patching job. After applying the mesh, wet the void with either a sponge for small holes or a garden hose for larger ones. This will help prevent the stucco patching material from drying out too quickly.
Mix your chosen stucco patching plaster, following the manufacturer’s instructions on the label. It is important to mix only as much as you can use in 15–20 minutes, as the patching plaster dries quickly. Wet the void again with a sponge for smaller holes or a garden hose for larger holes, and apply the patching plaster in 1/4″ layers, smoothing it as you go to blend it into your existing stucco finish.
Let the patching plaster dry for a day before applying a second coat and texturing it. This will help make the surface more durable and allow you to paint it without having to worry about damaging your beautiful new stucco.
You can also opt to use a pre-mixed stucco patch for this type of repair, depending on the thickness and texture you want your repaired surface to have. This will save you time and energy. Again, follow the manufacturer’s instructions to ensure your new patch will set correctly.
Once the patch is dry, you’re ready to paint your wall. Be sure to choose paint that matches your stucco finish. If you aren’t comfortable painting the entire wall, it’s a good idea to hire a professional to do this for you.
Stucco is a popular choice for exterior walls due to its beauty and durability. When maintained properly, it can last for decades and resist rot, mold, insects, and weather. However, over the years, it can crack or develop holes. In order to keep your stucco looking beautiful, it’s important to repair these problems as soon as possible.
